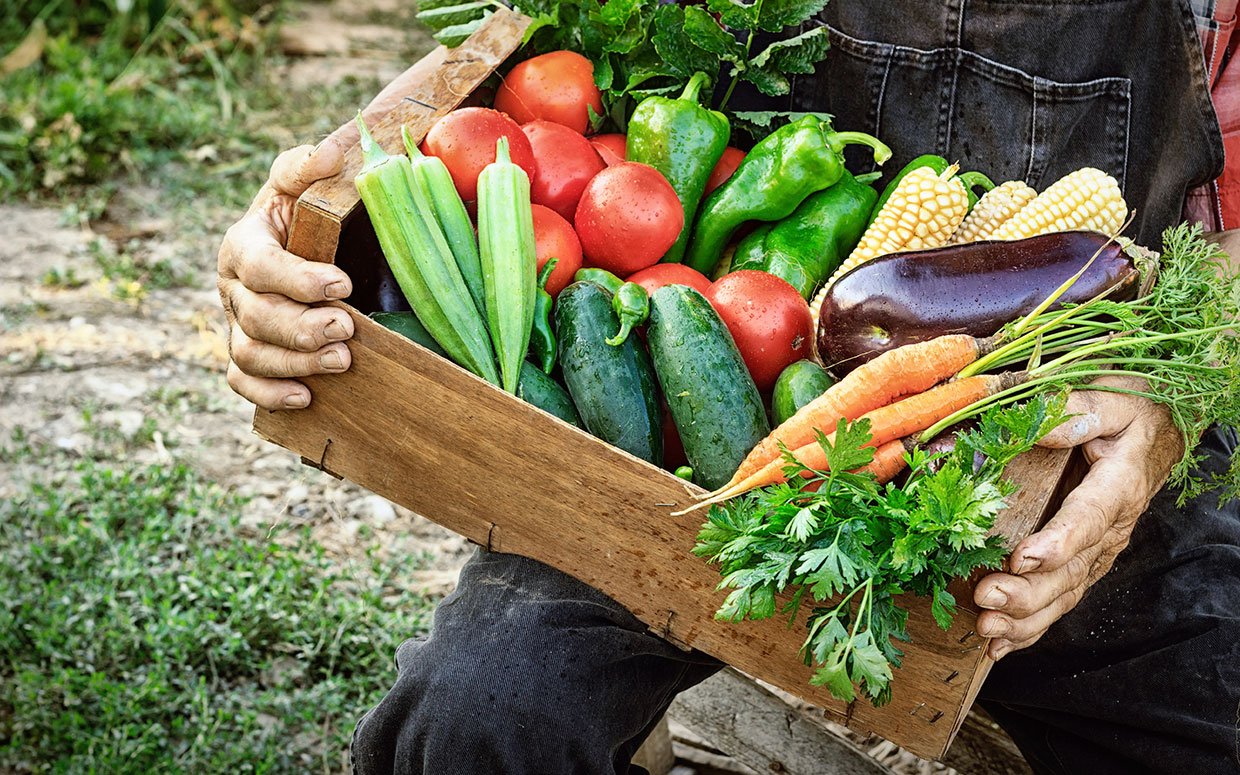
Our Produce.
Welcome to our Produce page. Find out more on each of our delicious, fresh offerings including planting, harvesting, and nutritional info!
LISTED ALPHABETICALLY

ANAHEIM PEPPER
Planting Time: mid-spring to late spring, early fall
Light: require full sun; minimum of 6 hours of sunlight per day
Soil: well-drained, deep, humus rich
Water: regularly water to keep soil moist throughout growing season; water once or twice a week, may vary depending on outdoor heat; avoid waterlogging the soil or making soil soggy to avoid root rot
Spacing: plant ¼ inch deep; seedlings should be spaced 12 to 24 inches apart; if planting rows, rows should be spaced 2 to 3 feet apart; if planting in raised beds, space peppers 14 inches apart
Height: 6 to 10 inches tall; 2 inches wide
Pests: susceptible to aphids, armyworms, cutworms, fruit worms, leaf miners, and pepper weevil
Harvest: Anaheim peppers are ready to harvest when peppers turn green and about 7 inches long; use shears to snip off peppers from the plant, leaving part of the stem attached; avoid pulling them off with hands to avoid damaging the plant; store in the refrigerator for 1 to 2 weeks to keep fresh; once peppers are chopped, use immediately to avoid spoilage
Nutrition: facts for 1 Anaheim pepper – 13 calories, 0.1 grams of fat, 1.9 milligrams of sodium, 112 milligrams of potassium, 3 grams of carbohydrates, 1.5 grams sugar, 0.6 grams of protein; great source of vitamin A, vitamin C, calcium, and iron; Anaheim peppers are beneficial for treating heart disease, diabetes, and cancer
Arugula

ARUGULA
Planting Time: plant in early spring or early fall
Light: full sun (6+ hours of sunlight)
Soil: well-drained, deep, humus rich
Water: keep soil evenly moist and drain well
Spacing: 1 inch apart, ¼ inch deep in rows 10 inches apart
Height: n/a
Harvest: the leaves taste best when young. Harvest leaves when they are about 2-3 inches long. Pull up the whole plants or cut individual leaves as necessary. The white flowers are also edible.
Pests: flea beetles, cabbage worms, downy mildew. Neem spray
Nutrition: one cup includes: 5 calories, 0.5 grams of protein, 27.7% of DV of Vitamin K, 3.2% of DV of Calcium, and 2.5% of Vitamin C. It is known to reduce cancer risk, help prevent osteoporosis, and help manage diabetes.

BOK CHOY
Planting Time: early spring or mid fall
Light: grows best in full sun (6 hours each day); tolerates part shade especially in summer months
Soil: well-drained, deep, humus rich
Water: needs consistent watering (especially in fall months); give 1 inch of water per week to keep soil moist between watering
Spacing: Seedlings should be space 6 to 12 inches apart; to grow rows of bok choy it should be spaces 18 to 30 inches apart
Height: 6 to 24 inches tall, 6 to 18 inches in spread
Pests: susceptible to cabbage loopers, cabbage worms, flea beetles, slugs, whiteflies, and aphids
Harvest: ready to harvest in 28 to 40 days, when plant reaches 12 to 18 inches tall; leaves should be harvested from the outer part of the plant (ensures inner leaves to keep growing); slice the plant about an inch above the ground (allows plants to re-sprout)
Nutrition: facts for 1 cup (70 grams) of bok choy – 9.1 calories, 0.1 grams of fat, 45.5 milligrams of sodium, 0.7 grams of fiber, 0.8 grams of sugar, 1.1 grams of protein; bok choy helps fight inflammation, reduces rick of heart disease, contains cancer-fighting compounds, provides non-dairy calcium, and help relieve symptoms of irritable bowel syndrome (IBS) and Crohn’s disease

BROCCOLI
Planting Info: Plant 18 inches apart form other seeds
Light: 6-8 hours of full sunlight exposure per day.
Soil: Moist, fertile, and well-draining soil required.
Water: 1 – 11/2 inches of water per week. (3.6-5.4 gallons per week of water relative to GroBox). Be careful not to soak developing broccoli heads. This can encourage rot.
Spacing: 12-20 inches apart.
Height: Begin to thin broccoli once it reaches 2-3 inches tall.
Pests: Aphids, cabbage loopers, cabbage root maggots and cabbageworms.
Harvest: Ready to be harvested 2-4 months after planting. Once the main head is harvested, it will continue producing smaller side shoots for the upcoming months.
Nutrition: Good source of Vitamin A, potassium, folic acid, iron, and fiber.
Brussel Sprouts
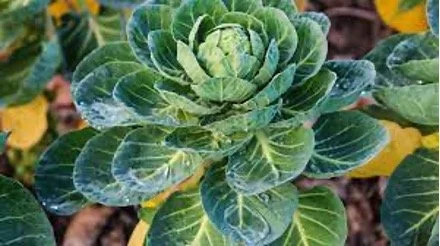
BRUSSEL SPROUTS
Planting Time: produce best when grown for fall or early winter (long growing period of 80-100 days to harvest). Plant starter plants early march or late September to late October (RTF started plant are already at least 36 days old)
Light: Do not need lots of sunlight
Soil: well-drained, deep, humus rich
Water: keep plants well-watered, especially if growing during hot weather. They should receive 1-1.5 inches of water per square foot per week
Spacing: Transplant Starter plants 12 -18 inches apart when they reach about 6 inches tall.
Height: 2-3 feet
Harvest: sprouts mature from the bottom of the stalk upwards. Harvest sprouts from the bottom when they reach about 1 inch in diameter. If wanted, after a moderate frost, pull up the entire stalk after removing the leaves. Then hang stalk upside down in a cool, dry area. Store stalks (no roots) for about 1 month. Do not wash the sprouts before storing them, only right before use. Keep fresh-picked sprouts in a plastic bag in the fridge for up to 5 days
Pests: aphids, black rot, cabbage loopers, cabbage root maggots, cabbageworms, clubroot, downy mildew, flea beetles, stinkbugs, white mold.
Nutrition: in one cup: 38 calories, 342 mg of Potassium, 8g of carbs, 3g of protein, 124% of DV of Vitamin C, 6% DV of Iron, 10% DV of Vitamin B6, 5% DV of Magnesium, 3% DV of Calcium

BUTTERNUT SQUASH
Planting Time: Spring (early April), Early Fall
Light: full sun. Transplant September, and the air and soil are at least 60° F; squash are very sensitive to the cold
Soil: well-drained, deep, humus rich
Water: water thoroughly, frequently, and consistently with at least 1 inch per week. Water at soil level and try to keep leaves and fruit dry.
Spacing: 1 inch deep with 2-3 feet apart. Or sow 3-4 seeds close together in small mounds in rows 3-6 feet apart
Height: spread
Harvest: harvest when fully mature; if you can pierce the skin with your fingernail, it is not mature. Harvest on a dry day after the vines have died back. Leave an inch or 2 of the stem on winter squashes. Cut the squash off the vine carefully with a sharp knife or pruners; do not tear. Never carry the squash by their stem- if the stem breaks it can get infected. Must be cured before storage. Before storage, wash (some recommend with LOW concentration bleach), air-dry the fruit, and store in a cool dry place with good circulation
Pests: squash bugs, cucumber beetles, aphids, squash vine borer, powdery mildew, blossom-end rot, anthracnose
Nutrition: one cup has: 63 calories, 493 mg of Potassium, 16g of carbs, 2.8g of fiber, 48% of DV of Vitamin C, 5% of DV of Iron, 10% of DV of Vitamin B6, 12% of DV of Magnesium, 6% of DV of Calcium
CHERRY TOMATO
Planting Info: Plant 1-2 feet apart then cover with ¼ inch of soil
Light: 6-12 hours of full sunlight exposure
Soil: Loamy, well-drained
Water: 6-8 inches per day (1-2 gallons per week relative to GroBox size)
Spacing: 1 foot apart and cover with ¼ inch of soil
Height: 4-8 feet tall
Pests: Blight, leaf spot, mosaic viruses, verticillium wilt, and tomato hornworms
Harvest: Ready 50-65 days after planting
Nutrition: Good source of Vitamin C and Potassium
Chinese Cabbage

CHINESE CABBAGE
Nutrition & Health Benefits
Chinese cabbage is a great source of vitamin C, iron, magnesium, and calcium. Chinese cabbage helps keep inflammation in check, improves digestion, and maintains good heart health. Chinese cabbage is packed with many antioxidant compounds and is an abundant source of soluble and insoluble dietary fiber.
1 Cup (109 grams) of Cooked Chinese Cabbage
Calories 13 |. Total Fat 0.2 grams |. Sodium 12 milligrams |. Potassium 95 milligrams | Carbohydrates 2.4 grams. | Protein 1.2 grams
Ways to Prepare
Chinese cabbage can be steamed, boiled, quickly stir-fried, or eaten raw. Chinese cabbage is a great addition to salads, sandwiches, and burgers. Cooked leaves and stalks add flavor to soups, stews, pasta dishes, and stir-fries. Chinese cabbage can also be used in coleslaw and in the Korean fermented dish, kimchi.
Recipes
§ Check out Martha Rose Shulman from The New York Times Cooking Spicy Stir-Fried Cabbage recipe.
§ For the perfect coleslaw at a family barbecue, check out Taste of Home’s Chinese Coleslaw recipe.
Fun Facts
Scrolls from 1000 BC found in China stated cabbage could be used to cure baldness in men. At the turn of the century, cabbage was thought to be food for poor people. Now it is regarded as one of the most nutritional vegetables and is thought to have strong anti-aging and anti-cancer properties.
Planting Time: Early spring or mid to late fall
Light: grows well in full sun or partial shade; should receive 4 to 5 hours of direct sunlight per day
Soil: well-drained, deep, humus rich
Water: should be watered when soil feels dry 1 to 2 inches down; soil should be fairly moist but not soggy; regular watering encourages growth and prevents cabbage from seeding too early
Spacing: Starter plants should be spaced 12” to 24” feet apart; the more space the cabbage is given the larger the heads will grow
Height: 20 inches tall; 5 inches wide
Pests: susceptible to cabbage worms, cabbage loopers, and flea beetles
Harvest: harvest should be expected around 40 days after planting; gently squeeze the head of the cabbage and if it is firm and has a little give, then they are ready to harvest; use a knife to cut the head of the cabbage at its base to harvest; if you want to clear the planting site, then pull up the entire plant with its roots; wrap the head of cabbage in plastic and store in the refrigerator for up to 2 weeks
Nutrition: facts for 1 cup (109 grams) of cooked Chinese cabbage – 13 calories, 0.2 grams of fat, 12 milligrams of sodium, 95 milligrams of potassium, 2.4 grams of carbohydrates, 1.2 grams of protein; great source of vitamin C, iron, magnesium, and calcium; Chinese cabbage helps keep inflammation in check, improves digestion, and maintains good heart health
Cilantro
CILANTRO
Nutrition & Health Benefits: Cilantro contains vitamin A, vitamin C, vitamin K, folate, potassium, and manganese. Cilantro helps support brain health, reduce anxiety, healthy blood sugar management, and prevent foodborne illnesses. Cilantro in small amounts contains very low calories, carbohydrates, and nutrition; if eaten in larger amounts is when sufficient nutrition could be consumed.
Ways to Prepare:
It is essential to clean your cilantro in water before eating and make sure to pat dry with either a dish towel, paper towel, or salad spinner. Remove the larger stems and then chop the leaves and the remaining stems together with a sharp knife. Chopped cilantro is a great flavor booster in sour cream, rice, salads, coleslaw, stir-fry, pasta salads, oils, and green sauces.
Recipes
§ To spice up your salads, check out Love & Lemons Cilantro Lime Dressing recipe.
§ If you are looking to add some flavor to your chicken, check out Budget Bytes Easy Cilantro Lime Chicken recipe.
Fun Facts
Cilantro is truly an international herb that is used in a wide variety of cuisines around the world, including Asia, The Middle East, India, Europe, The Mediterranean, Africa, Mexico, and South America. In addition to its culinary uses, cilantro was a widely used folk medicine for a variety of conditions and has been shown to have anti-bacterial, antioxidant, and other health-boosting properties.
Planting Info: Plant ¼ - ½ inch deep and 1-2 inches apart
Light: Bright, indirect light
Soil: Light, well-drained and moderately fertile loam or sandy soil.
Water: Especially necessary during germination period, light water
Spacing: For harvesting leaves: Set the seeds 2 inches apart in rows 12 to 15 inches apart.
For harvesting seeds: Plant the seeds 8 inches apart in rows 15 inches apart.
Height: 3-4 inches
Pests: Bacterial leaf spot (Pseudomonas syringae pv. coriandricola), Beet armyworm (Spodoptera exigua), Cabbage looper (Trichoplusia ni), and Green peach aphid (Myzus persicae). Neem oil should keep all under control with the exception of Beet armyworm – use Bt Sevin pyrethrin
Harvest: Ready after 45-70 days after seeding. Cut exterior leaves once they reach 4 to 6 inches long. Or, cut the whole plant about 1 to 2 inches above the soil level to use both small and large leaves.
Nutrition: Great source for Vitamin A, calcium, potassium and Vitamin K. In one cup of cilantro -- Calories: 4 | Protein: 0.3 g | Sugar: 0.1 g | Dietary Fiber: 0.4 g | Fat: 0.1 g | Sodium: 7.4 mg
Collards
COLLARDS
Planting Time: Fall or Spring
Light: Full sun (fall/winter crop), Part sun (spring/summer crop)
Soil: Well-drained, deep, humus rich
Water: Like moisture and good drainage, so don’t let them get too dry. You can also add mulch to help maintain the moisture level. It is good to water in the evening during the hot months, and in the late morning or afternoon during cooler months.
Spacing: 18″ apart, and 18″ to 24″ or more between rows.
Height: Up to 30″ tall
Pests: Green cabbage worms. Remove by hand
Harvest: Mature in 45 days but can be harvested for many months afterward. You can start harvesting the bottom leaves when 8″ to 10″ tall. Harvest bottom leaves. Harvesting only the bottom leaves as you need them (instead of harvesting the entire plant at once), allows the plant to continue to produce new leaves from the top/center of the plant for many months.
Nutrition: USDA, Per 1 cup (36 g): 11 Calories, Sodium 6 mg, Potassium 77 mg, Total Carbohydrate 2 g, Sugar 0.2 g, Protein 1.1 g. Collards also contain in 1 cup 21% Vitamin C, 1% Iron, 8% Calcium, and 2% Magnesium

CUCUMBER, PICKLINHG
Planting Time: mid to late spring, early fall (plant 3 weeks after last frost of the season
Light: thrive full sun; minimum of 6 hours of sunlight per day; can tolerate partial shade
Soil: well-drained, deep, humus rich
Water: should receive 1 inch of water per week; consistent watering is critical for cucumbers; make sure soil does not reach sogginess, but also is not dry
Spacing: ½ inch deep into soil; space 18 to 36 inches apart
Height: 3 to 4 inches tall; 1 inch wide
Pests: susceptible to banded cucumber, spotted cucumber, squash vine borers, cucumber beetles, and squash bug. Spray Neem solution &/or Plant marigolds to deter beetles.
Harvest: pickling cucumbers are ready to harvest when 3 to 4 inches long, slightly immature, and are green in color; avoid waiting to harvest until cucumbers have turned yellow which indicates over maturity; to harvest, cut, snap, or twist cucumbers from the vine; do not pull them off the vine to avoid damaging the vine; to store, wrap in a damp paper towel and place in an air-tight container in your refrigerator; they will remain fresh for about 1 week
Nutrition: facts for 1 ½ cup (52 grams) of sliced, unpeeled cucumbers – 8 calories, 0.1 grams of fat, 1 milligram of sodium, 1.9 grams of carbohydrates, 0.3 grams of fiber, 0.9 grams of sugar, 0.3 grams of protein; great source of vitamin K, vitamin C, and potassium; pickling cucumbers eases diverticulitis, reduces risk of cancer, improves blood sugar control, promotes hydration, and supports heart health

CUCUMBER, SLICING
Planting Time: mid-spring to late spring, early fall
Light: thrive full sun; minimum of 6 hours of sunlight per day; can tolerate partial shade
Soil: well-drained, deep, humus rich
Water: should receive 1 inch of water per week; consistent watering is critical for cucumbers; make sure soil does not reach sogginess, but also is not dry
Spacing: ½ inch deep into soil; space 18 to 36 inches apart
Height: 6 to 8 inches tall; 1 inch wide
Pests: susceptible to banded cucumber, spotted cucumber, squash vine borers, cucumber beetles, and squash bug. Spray Neem solution &/or Plant marigolds to deter beetles
Harvest: slicing cucumbers are ready to harvest when 6 to 8 inches long, slightly immature, and are green in color; avoid waiting to harvest until cucumbers have turned yellow which indicates over maturity; ; to harvest, cut, snap, or twist cucumbers from the vine; do not pull them off the vine to avoid damaging the vine; to store, wrap in a damp paper towel and place in an air-tight container in your refrigerator; they will remain fresh for about 1 week
Nutrition: facts for 1 ½ cup (52 grams) of sliced, unpeeled cucumbers – 8 calories, 0.1 grams of fat, 1 milligram of sodium, 1.9 grams of carbohydrates, 0.3 grams of fiber, 0.9 grams of sugar, 0.3 grams of protein; great source of vitamin K, vitamin C, and potassium; slicing cucumbers eases diverticulitis, reduces risk of cancer, improves blood sugar control, promotes hydration, and supports heart health
Eggplant

EGGPLANT
Planting Time: Mid to late Spring, well after last frost, Early Fall and the air and soil are at least 60° F 65° F
Light: sunny, tropical weather
Soil: well-drained, fertile, sandy looms.
Water: consistent water, at least 1 inch per week
Spacing: 24 to 36 inches apart
Height: 2-4 feet
Harvest: can be harvested when they are 1/3 to full size. Harvest before the skin becomes dull and the seeds become hard. Dig your thumbnail into the side; if the indentation stays, it’s ripe and ready. Better to cut the fruit off the plant. Beware of the spines on the stem- they can hurt an ungloved hand. Handle with care to not bruise
Pests: cutworm, eggplant flea beetle, serpentine leafminer, spider mites. Sevin and neem oil, as well as beneficial insects and diatomaceous earth with help.
Nutrition: a cup has: 20 calories, 4.8 g of carbs, 2.4 grams of fiber, 0.8 grams of protein, 3% Vitamin C, 5% Vitamin B6, 2% Magnesium
French Breakfast Radish

FRENCH BREAKFAST RADISH
Nutrition info:
French Breakfast radishes contain Vitamin C, calcium, magnesium, folate, and potassium. Natural medicine practitioners recommend radishes for their ability to promote healthy digestion. French Breakfast radishes also contain glucosinolates, which have been shown to be beneficial in the prevention of certain cancers and are what give radishes their distinctly peppery flavor.
Energy: 14 calories
Protein: 0.7g
Carbs: 1.9g
Fat: 0.1g
Preparation:
To prepare radish greens, remove the roots and reserve them for another use. Wash the leaves well to remove any soil or grit that may be clinging to the leaves. Dry the greens, then chop them as appropriate for your recipe. The greens are now ready to cook. Radish greens can be added to dishes like curries, soups, stews, quiches, frittatas, and casseroles to add color and boost nutrition. They can also be sauteed, blanched, braised, or steamed on their own or with other cooking greens the same way you would prepare kale, Swiss chard, or turnip greens.
How to Enjoy:
Dice French Breakfast radishes and toss in salads or add to tacos, omelets, or tea sandwiches. They can be used whole and roasted, braised, or pickled. The subtle heat of the peppery French Breakfast radish marries well with sweet cream, butter, and salt. When serving radishes with butter or creamy cheeses score at the tip with an X to help the dips better adhere to the radish.
The greens of the French Breakfast radish can go straight into salads, or be added to soups or kinds of pasta. Radishes pair well with blue and feta cheeses, as well as lemon juice and fresh herbs. They also make an attractive edible garnish on crudité trays and cheese boards. To store keep radishes refrigerated and use within one week.
Background:
Although named "French breakfast," the French do not eat radishes as part of their first meal of the day. They do eat them as a snack, sometimes dipped in salt, sometimes lightly buttered and then dipped in salt, and sometimes sliced and served on a toasted, buttered baguette along with a sprinkling of salt.
Radish comes from the Greek word for "fast appearing" and like many varieties of radish, French Breakfast radish grows quickly and is typically ready for harvest in twenty to thirty days.
As well. radish leaves have value to us. Radish greens are the leafy tops of the radish plant. While we tend to focus on the colorful roots, the greens are edible and rich in nutrients as well. Radishes may be sold in bags with their tops removed, but they are often left intact. Fresh, healthy-looking greens are a sign that a bunch of radishes has been recently harvested and handled appropriately. The affordable greens can be eaten raw in salads or cooked, and simply need to be washed before eating.

JALAPENO PEPPER
Planting Time: mid to late spring, early fall.
Light: plant in full sun; need minimum of six hour of direct sunlight per day; shade should be avoided
Soil: well-drained, deep, humus rich
Water: require lots of water; water when soil feels dry 1 inch into soil; make sure to avoid waterlogging soil; mulch is helpful in conserving soil moisture.
Spacing: covered with ¼ inch of soil; should be spaced about 14 to 16 inches apart; if planting in rows, rows should be 2 to 3 feet apar
Height: 1 to 3.5 feet tall; 0.5 to 1 foot wide
Pests: susceptible to aphids, cucumber beetle larvae, pepper hornworms, and mites.
Harvest: should be harvested when 4 inches and dark green in color (ensures heat); jalapeños should be snipped off with pruners leaving a bit of the stem on each pepper; if temperatures drop below 35 degrees Fahrenheit, the peppers should be harvested and left on a bright windowsill to continue ripening indoors; jalapeños should be stored unwashed in a loose-covered container in the refrigerator to keep them fresh for about a week (can also be frozen or dried for later use)
Nutrition: facts for one jalapeño pepper (14 grams) – 4 calories, 0.05 grams of fat, 0.4 milligrams of sodium, 0.5 grams of carbohydrates, 0.4 grams of fiber, 0.6 grams of sugar, 0.1 grams of protein; jalapeño peppers help relieve nerve and joint pain and reduces inflammation

KALE
Planting Time: Early Fall, Late Fall & Early Spring
Light: Full sun (fall/winter crop), Part sun (spring/summer crop)
Soil: well-drained, deep, humus rich
Water: liberally but needs well drained soil (if don’t have recent BM7 mix from us add mulch around starter plant).
Spacing: 12″ apart
Height: 12″ to 18″ tall
Pests: Green cabbage worms (those pretty little white butterflies fluttering around your garden make some small holes in the leaves) but aphids and orange and black harlequin bugs are kale’s worst pests. Neem oil is effective treatment.
Harvest: Continuous small batch harvest- When leaves about size of hand you can start to take only the lower/bottom/outside leaves by cutting them away. Harvest only these leaves, so that the plant can continue to produce new leaves from the top or center of the plant. As soon as central flower stalk emerges and begins to flower harvest whole plant. After they produce flowers Kale become bitter and tough to eat.
Nutrition (Mayo Clinic): Kale is a nutrition superstar due to the amounts of vitamins A, K, B6 and C, calcium, potassium, copper and manganese it contains. One cup of raw kale has just 33 calories and only 7 grams of carbohydrate. So, it's a very diabetes-friendly/weight-friendly vegetable

KOHLRABI
Planting Time: mid-spring and mid-fall
Light: requires full sun throughout the day; minimum of 6 hours of sunlight per day
Soil: well-drained, deep, humus rich -raised beds will provide tender kohlrabi bulbs
Water: requires a uniform moisture level throughout the growing season for optimal yields; needs 1 inch of rain or watering per week
Spacing: starter plants should be spaced 6” to 12” inches apart; if planting rows of kohlrabi, each row should be 12 inches apart
Height: 18 inches tall; 18 to 24 inches wide
Pests: susceptible to aphids, cabbage loopers, diamondback moths, cutworms, flea beetles, cabbage maggots, and whiteflies.
Harvest: kohlrabi is ready to harvest when the bulb (edible large stem) is 2 to 3 inches in width; cut the kohlrabi root off at ground level; stem should be tender, greens are also excellent. Both can be stored in the refrigerator for around 2 weeks; remove leaf stems and wash before storing.
Nutrition: facts for 1 cup (135 grams) of raw kohlrabi – 37 calories, 0.1 grams of fat, 27 milligrams of sodium, 8 grams of carbohydrates, 4.9 grams of fiber, 3.5 grams of sugar, 2.3 grams of protein; kohlrabi helps protect against cell damage and provides better heart health

LI REN CHOI
Li Ren Choi is an extremely attractive mini pak choi with light green stems and slightly darker green leaves. This variety develops a pak choi shape at a very early stage. It can even be planted in trays and harvested at transplanting time. It is one of the smaller mini pak choies on the market. This variety is ideal for producing premium pak choi hearts for the Asian market.
Nutrition: facts for 1 cup (135 grams) of raw kohlrabi – 37 calories, 0.1 grams of fat, 27 milligrams of sodium, 8 grams of carbohydrates, 4.9 grams of fiber, 3.5 grams of sugar, 2.3 grams of protein; kohlrabi helps protect against cell damage and provides better heart health
MESCLUN LETTUCE
Planting Time: Early to mid spring, mid to late fall
Light: partial shade, about four hours of sun daily. It can prefer some afternoon shade if you are sowing a fall crop in summer.
Water: Until germination keep soggy not moist
Spacing: Distribute the seeds evenly about 1/2 inch apart
Height: 5 inches
Pests: Cabbage Looper, Cutworm, Black
Harvest: Mesclun or spring mix only takes 4 to 6 week to mature. The mix should be harvested when the baby greens are under 3 inches, approximately 3 to 4 weeks old.
Nutrition (Mayo Clinic): Nutriton Facts per 1 serving. Calories: 180 9%, Carbs:12g 4%, Sugar: 5g, Fiber: 5g 20%, Protein:11g 22%, Fat: 11g 17%, Saturated Fat: 6g 30%, Trans Fat0g 0%, Cholesterol 30 mg 10%, Sodium 230 mg 10%, Vitamin C 30 mg 50%, Calcium 300 mg 30%, Iron 1.8 mg 10%, Potassium 295 mg 8%, Vitamin B mg 6%, Vitamin E0.60 mg 3%, Magnesium 26 mg 6%
Mustards

MUSTARDS
Planting Time: Early Spring: mid-March to mid April. Early Fall: mid-September to mid- October
Light: sunny location in the fall or spring
Soil: well-drained soil
Water: sprinkle the soil regularly
Spacing: bed the soil into mound 6 inches high and plant 12 inches apart
Pests: flea beetles, cabbage looper, aphid, root maggot. Treat: Neem spray, dipel, powder or spray and beneficial insects (lady bugs) will help.
Harvest: To harvest mature mustard greens, simply snap off the outermost leaves with your thumb and forefinger, leaving the growing point intact. Picking them in this manner enables the plant to produce subsequent flushes of harvestable leaves, extending the harvest for many weeks.
Nutrition: Mustard greens are one of the most nutritious foods you can eat as they are low in calories yet rich in fiber and micronutrients. One cup (56 grams) provides: 5 calories, 2 grams of protein, 2 grams of fiber, 9% of the DV of Vitamin A, 6% of the DV of Vitamin B6, 44% of the DV of Vitamin C, 8% of the DV of Vitamin E, 120% of the DV of Vitamin K, and 10% of the DV of Copper. Cooking it increases vitamin levels

OKRA
Planting Time: Plant 2-3 weeks after frost date for maximum yield
Light: Full sun exposure of 6-8 hours per day
Soil: Fertile, well-drained soil
Water: Water every 7-10 days until soil is evenly soaked. Sandy soils will need more water to account for dryness
Spacing: Plant the okra seeds about 1 inch deep and 2 inches apart in the row. Space the rows at least 3 feet apart
Height: 2-6 feet tall
Pests: Aphids and stink bugs
Harvest: Harvest the pods when they are 3-4 inches long. Pick the okra every 1-2 days or
yields will decrease
Nutrition: Fair source of calcium and Vitamin C
OREGANO
Planting Time: Plant 3-4 weeks before Spring
Light: Full and strong sun exposure is required. 6-8 hours of sunlight per day.
Soil: Plant in well-drained soil with a temperature preferably around 70 degrees Fahrenheit.
Water: Water when the soil is dry and water until it is evenly soaked. Oregano does not require as much water as many other pants would.
Spacing: Plant 8-10 inches apart.
Height: 1-2 feet tall with an 18-inch spread.
Pests: Root and stem rots, aphids, spider mites.
Harvest: Harvest right before the flowers bloom for maximum flavor.
Nutrition: Very high amounts of iron, calcium, magnesium, vitamin B6, potassium, vitamin A and vitamin C
PARSLEY
Planting Info: Plant ¼ inch deep and 6-10 inches apart
Light: Sunny area with 6-8 hours of sunlight a day
Soil: Plant in well-draining soil rich with organic matter
Water: Keep watered daily especially during hot summers
Spacing: Sow ¼ inch deep and 6-8 inches apart.
Height: 8-12 inches off the ground
Pests: Stem rot, leaf spots, carrot fly, celery fly larvae and black swallowtail butterfly caterpillars.
Harvest: Harvest when leaf stems have three segments. Cut leaves from the outer portions of the plant whenever you need them. Leave inner portions of the plant to mature.
Nutrition: High in Vitamin C, Vitamin A, and Iron.
Red Cloud Tatsoi
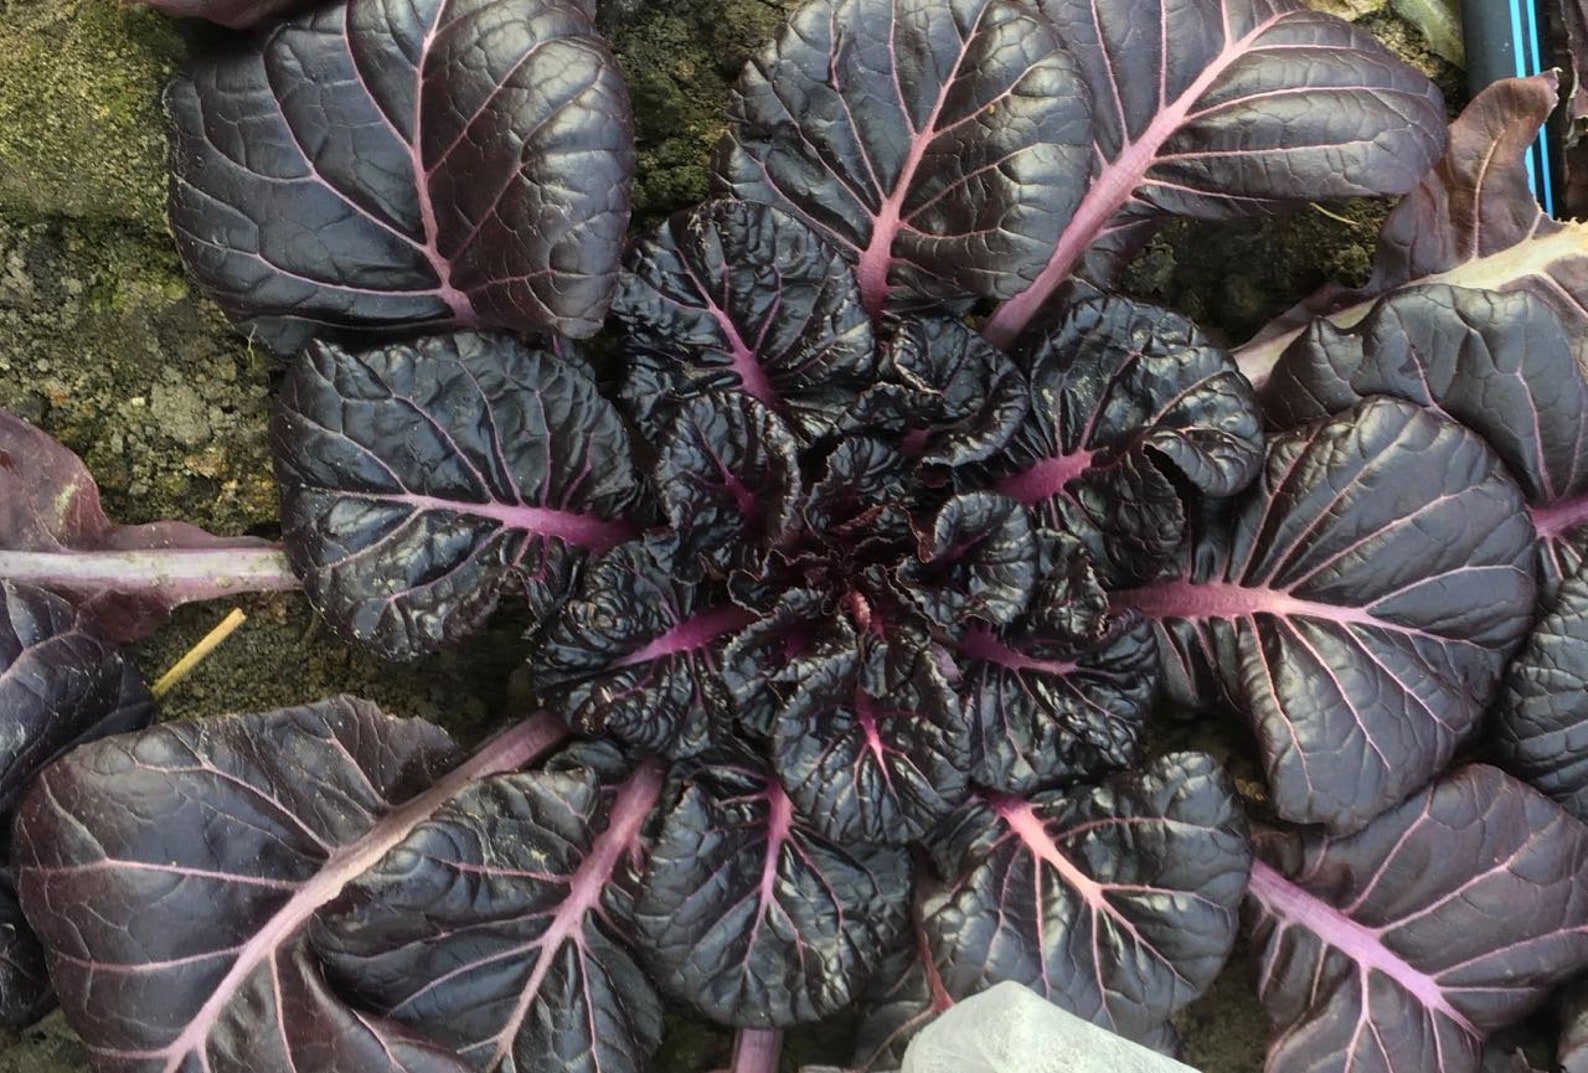
RED CLOUD TATSOI
About: Red cloud tatsoi, botanically classified as Brassica rapa subsp. narinosa, is an ancient, non-heading mustard green belonging to the Brassicaceae family. The curved, spoon-like leaves have been grown in Asia for thousands of years, favored for their mild, sweet, and tangy flavor. Tatsoi is known by several names, including Wu Ta Cai in China, Tasai in Japan, Spoon Mustard, Broadbeak Mustard, Rosette Bok Choy, Spinach Mustard, Tat Soy, and Chinese Flat Cabbage. The crisp greens are a cool-season plant that can withstand frost, snow, and cold temperatures. Tatsoi was once primarily associated with Asian cuisine, as its roots stem from Asia, but recently the greens have been introduced worldwide, fusing into many different cuisines. Tatsoi remains a specialty green outside of Asia, found through local markets, but the hardy plants are also increasingly being cultivated by home gardeners, valued for their cut-and-come again nature, cold tolerance, and succession planting abilities.
Nutritional Info:
Tatsoi is a good source of vitamins A and C to boost the immune system, protect the cells against free radical damage, and reduce inflammation. The greens are also a good source of potassium to balance fluid levels within the body, calcium to strengthen bones and teeth, and provide some folic acid, iron, and antioxidants. In addition to vitamins and minerals, Tatsoi contains glucosinolates. These natural compounds are believed to create metabolites that help activate reactions within the body to potentially protect against diseases that damage cells.
Preparation:
Tatsoi is versatile green with a mild, subtly tangy flavor well suited for raw or lightly cooked applications. Young leaves are often favored for mixed salads and are an excellent accompaniment to other greens such as spinach, arugula, watercress, pea tendrils, and mizuna. Tatsoi can also be layered into sandwiches, torn and used as a topping over pizza and tacos, or blended into pesto as a unique variation. The crisp greens can be
incorporated as a substitute in recipes for bok choy, and when young, the tender leaves can be used in place of spinach. Tatsoi is also frequently utilized in lightly cooked preparations, including stir-frying, sautéing, steaming, and braising. The leaves and stems can be chopped and baked into quiche, stir-fried with other vegetables as a side dish, sauteed as a bed of greens for fish, wilted with warm sauces or dressings for a softer consistency, or mixed into soups just before serving. Beyond raw and cooked preparations, Tatsoi can be pickled to extend its shelf life and served as a fermented flavoring in stir-fries, soups, and noodle dishes. The greens also complement ingredients rich in umami such as scallops, mushrooms, seaweed, and sesame and fermented ingredients such as fish sauce, soy sauce, and vinegar. Tatsoi will keep for 3 to 5 days when unwashed, wrapped in a damp paper towel, and stored in a plastic bag in the refrigerator. The greens can also be blanched, rinsed with cold water, and frozen for extended use.
Fun Fact/History:
Tatsoi is native to a region near the Yangtze River in Central China, where it has been cultivated since at least the 6th century. Tatsoi became widely adapted into Japanese cuisine and was so revered that the leaves were accepted into Japanese history as an essential ancient green. Today Tatsoi has been spread worldwide through globalization, migrating peoples, and the rise of online seed retailers. The greens are cultivated commercially and grown in home gardens, and when in season, they can be found fresh through farmer’s markets, specialty grocers, and in home gardens.
Red Mizuna
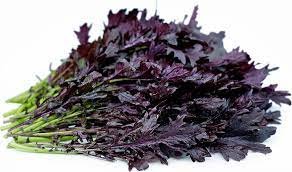
RED MIZUNA
About:
Red Mizuna greens are small to medium in size, averaging thirty centimeters in height,
and grow in bunches from a central stalk with slender stems and feathery leaves. The thin stems are light green to magenta and are long, offering a firm, crisp texture. The smooth leaves are red-purple, multi-branched, and have serrated edges with a fringed appearance. On the underside of the leaf, some varieties have green undersides and dark purple veins, while others have varying shades of red, purple, and green.
Nutrition Info:
Red Mizuna contains vitamins A, C, and K, folate, iron, B-complex vitamins like niacin, riboflavin, and thiamine, calcium, magnesium, selenium, zinc, and manganese. Red Mizuna also has several compounds like glucosinolates, kaempferol, and anthocyanin, which is the red pigment in the leaves, that offer antioxidant benefits.
Preparation:
Red Mizuna is best suited for both raw and cooked applications such as sautéing, stir-frying, and boiling. The young leaves can be combined with other lettuces like spinach, arugula, chard, oak leaf, romaine, and frisee to make mesclun or spring mixes. The leaves can also be layered in sandwiches or mixed in grain bowls, pasta salads, noodle dishes, risotto, stews, or soups. If cooking with Red Mizuna, the leaves should be added at the end of the cooking process to prevent sogginess. Red Mizuna can also be used in recipes calling for frisee or arugula. The leaves will keep up to five days when wrapped loosely and stored in the crisper drawer of the refrigerator. Red Mizuna lettuce is harvested at both the baby lettuce and mature stages, with the younger leaves being more tender and milder and the older leaves offering a peppery, piquant, and mildly bitter taste with a hint of sweetness.
Fun Fact:
Mizuna is one of the forty-one protected ‘Kyo yasai’ vegetables grown in Kyoto, once the center of politics and culture in Japan, since the 18th and early 19th centuries. These heirloom vegetables were grown in relative isolation and offer bold colors and unique flavor profiles.
Red Stem Radish
RED STEM RADISH
As Microgreen (CSA March 30, 2022)
Nutritional Info:
The radish microgreen is a good source of vitamin C, energy and carbohydrates. It also contains zinc, potassium, folate, manganese, copper, sodium, phosphorus, dietary fiber, niacin, riboflavin, vitamin B1 & B6, calcium, iron, magnesium and so much more. Radish microgreens contain the highest levels of vitamin E among the microgreens.
About/Preparation:
Can be prepared as a finisher to a salad composed of watermelon and avocado
Fun Fact:
A growing number of studies have reported that radish microgreens provide multiple crucial medical benefits due to their rich nutritional components, including antioxidant, cardiovascular, gastrointestinal, anti-inflammatory benefits, and anti-cancer properties.

SERRANO PEPPER
Planting Time: mid-spring, early fall
Light: require full sun to thrive; minimum 6 hours in direct sunlight per day
Soil: well-drained, deep, humus rich
Water: should be watered when soil feels dry 1 to 2 inches down; should be watered at the base of the plant to prevent mildew; be sure to not waterlog peppers; key is to make sure soil is consistently moist but never soggy
Spacing: scatter seeds about ¼ inch deep; nursery plants should be planted at ¼ inch deep; should be spaced 1 to 2 feet apart; if planting in rows, make sure rows are 18 inches apart; suggested to stake plants to avoid dropping when peppers are about to ripen
Height: 2 to 3 feet tall; 1.5 feet wide
Pests: susceptible to cutworms, aphids, and whiteflies
Harvest: should be ready to harvest in about 80 days when peppers are still green but at their mature size for best flavor; use shears to remove serranoes from the vine, pulling them might injure the tender steams; make sure to wear gloves when handling the peppers to protect skin from capsaicin; serranoes can be stored in the fridge for up to a week
Nutrition: facts for one cup (105 grams) of raw, chopped serrano pepper – 33.6 calories, 0.5 grams of fat, 10.5 milligrams of sodium, 7 grams of carbohydrates, 3.9 grams of fiber, 4 grams of sugar, 1.8 grams of protein, 47.1 milligrams of vitamin C, 350 milligrams of potassium, 0.1 milligrams of copper, and 0.2 milligrams of manganese; serrano peppers support cardiovascular health, assist with blood sugar regulation, and help with deep tissue inflammation
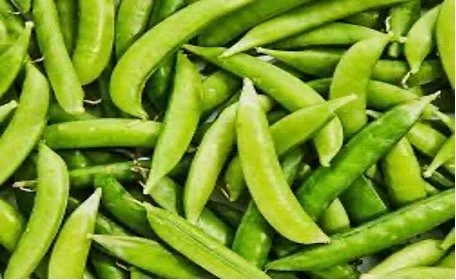
SUGAR SNAP PEAS
Planting Time: Spring or Fall
Light: As transplants Early to Mid Spring. Early to Mid Fall-plant in the last 8-10 weeks before the first expected frost to guarantee a plentiful harvest
Soil: well-drained, deep, humus rich
Water: do not let the soil dry out but do not overwater
Spacing: 1-1.5 inches deep and 1 inch apart in single or double rows. Allow 18-24 inches between single or pairs of rows. All 8-10 inches between double rows in pairs
Height: n/a
Harvest: harvest when the induvial peas have grown to the size of BBs, or when the pods have reached their full length. Pick the peas at least every other day to ensure that the pods are sweet and free of fibers. Pods can be stored in a plastic bag in the fridge up to 2 weeks
Pests: Army worms, Cucumber betel (plant marigold near deters beetles) Leaf miners, Spider mites. Cut worms (take off by hand)
Nutrition: in a 100g serving: 42 calories, 7.5 grams of carbs, 2.6 grams of fiber, 2.8 grams of protein, 22% of DV of Vitamin A, 100% of the DV of Vitamin C, 31% of DV of Vitamin K, 12% of DV of Manganese

SUMMER SQUASH
Planting Time: Early-ish Spring, after last frost, Early Fall and the air and soil are at least 60° F
Light: full sun and shelter from wind
Soil: well-drained, deep, humus rich
Water: thoroughly water after planting. Water thoroughly, frequently, and consistently with at least 1 inch per week. Do not water shallowly, the soil needs to be moist 4 inches down
Spacing: sow seeds in level ground 1 inch deep and 2-3 inches apart (or sow 3-4 seeds close together in small mounds in rows 3-6 feet apart)
Height: 1-2 feet
Harvest: harvest when tender and a bit immature (6-8 inches). Cut (do not break) fruit off the vine with a sharp knife. Leave at least 1 inch of stem on the fruit. Complete the harvest before the first fall frost- highly susceptible to frost and heat damage. Has a relatively short shelf life. Store in the fridge for up to 10 days
Pests: squash bugs, squash vine borers, powdery mildew, blossom-end rot
Nutrition: one cup has: 19 calories, 3.8g of carbs, 1.2g of fiber, 1.5g of protein, 33% of DV of Vitamin C, 10% of DV of Vitamin B6, 5% of DV of Magnesium

SWEET BELL PEPPER
Planting Time: mid to late spring, early fall.
Light: minimum of 6 hours of sunlight per day; avoid sites that will not be shaded by trees or other plants
Soil: well-drained, deep, humus rich
Water: slow, deep watering aids the root system to grow strong; water once a week unless temperatures are hotter and drier, then monitor soil’s dryness; during summer months, watering everyday may be necessary
Spacing: seedling should be spaced 18 to 24 inches apart and planted ¼ inch deep into the soil
Height: 6 to 12 inches or 1 to 3 feet tall
Pests: susceptible to flea beetles, leaf miners, spider mites, and aphids. Spray neem oil.
Harvest: sweet bell peppers are ready for harvest 8 to 10 weeks after planting; peppers should appear shiny, firm, and dark green at time of harvest, but are still harvestable if left on the plant to turn red; the longer bell peppers are left on the plant, the sweeter they become; use a sharp knife or scissors to cut peppers clean off of the plant; to store, use a covered container or plastic bag to store in the refrigerator; good with 5 to 10 days of harvesting;
Nutrition: facts for 1 cup of chopped sweet bell pepper – 30 calories, 1 gram of protein, less than 1 gram of fat, 7 grams of carbohydrates, 2.5 grams of fiber, 3.5 grams of sugar; great source of potassium, vitamin A, vitamin B6, and vitamin E; sweet bell peppers help lower blood pressure, reduce risk of heart attack, support digestive health, and reduce the risk of Type 2 diabetes.
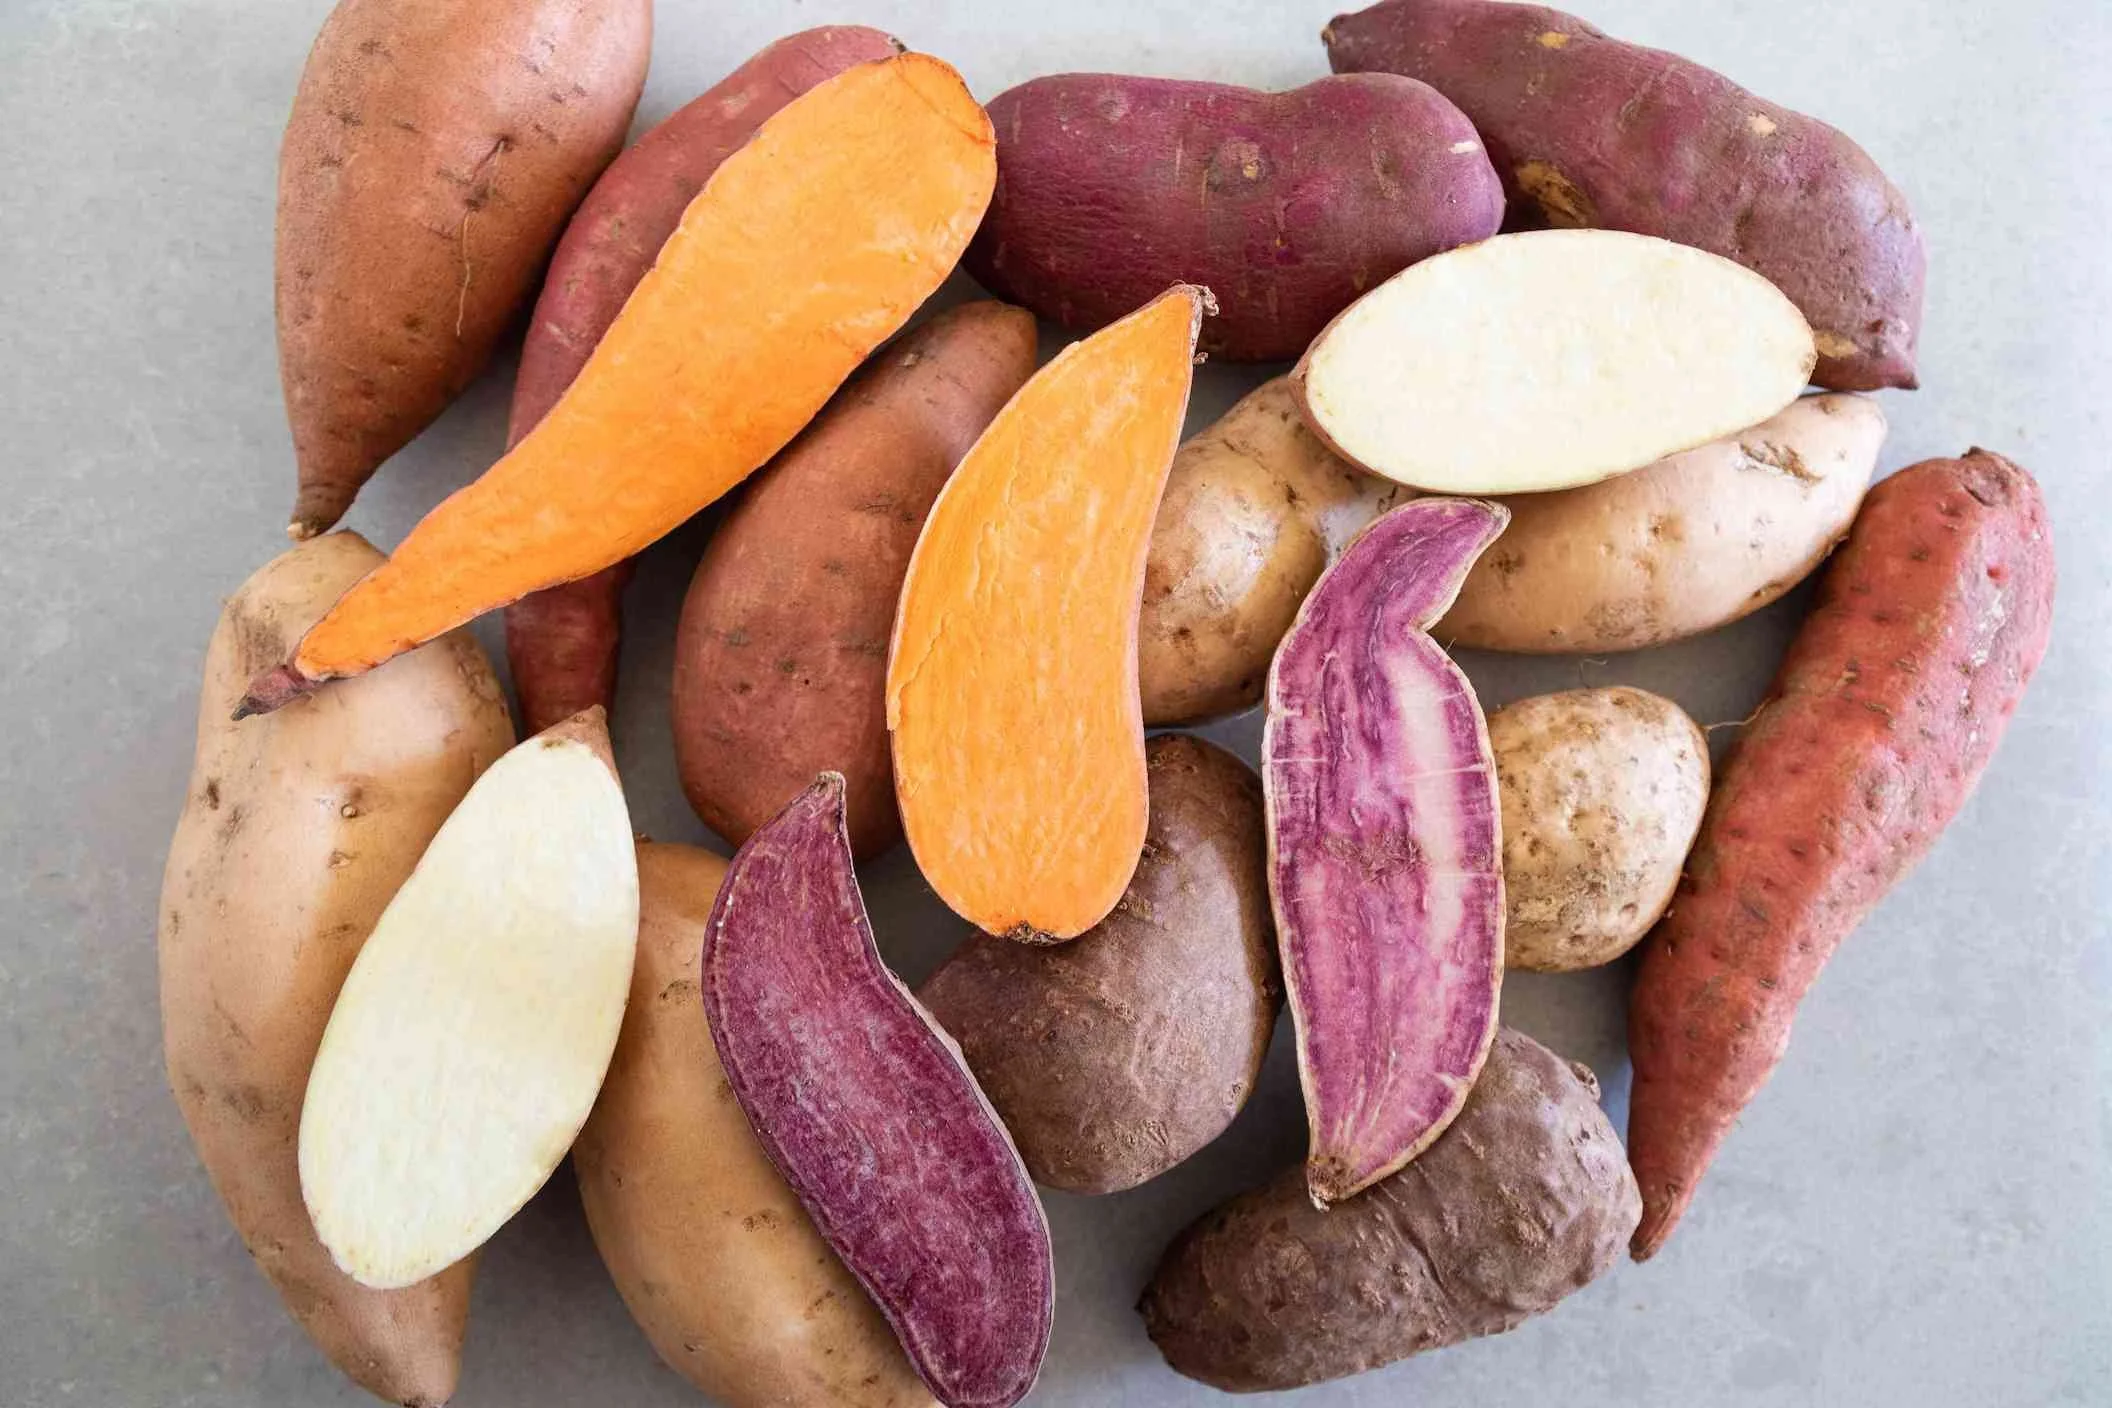
SWEET POTATOES
Info: Thanks to Medical News Today for this info.
Sweet potatoes are a staple food in many parts of the world. They are a good source of fiber, potassium, vitamins, and other essential nutrients.
Some people use the terms “sweet potato” and “yam” interchangeably. However, they are not related. Yams have a drier texture and a more starchy content than sweet potato.
CLICK HERE for a great primer on the many benefits of eating sweet potatoes.
Cooking tips:
Roast sweet potatoes to bring out their natural flavor, and eat them without toppings. Sweet potatoes have a naturally sweet and creamy taste.
To roast them around a campfire or on a barbecue, wrap them in aluminum foil and place in the dying coals. Leave for around 50–60 minutes, until a fork slides into them easily.
People who do not plan to eat the skins can put the potato into the coals without wrapping it in foil.
To prepare a sweet potato quickly, prick it with a fork, wrap it in a paper towel, and put it in a microwave on high heat until soft.
If a person wants to add a topping, try:
a sprinkling of cinnamon, cumin, or curry powder
a spoonful of low fat cottage cheese or Greek yogurt
a drizzling of olive oil
Other ways to incorporate sweet potato into the diet include adding roasted sweet potatoes and pecans to a salad and topping it with balsamic vinegar, and adding sweet potato to pancakes or hash browns.
Sweet potato recipes
Try these simple and healthful sweet potato recipes:

SWISS CHARD
Planting Time: early spring, or in mid to late Fall
Light: partial sun
Soil: well-drained humus-rich
Water: Swiss Chard likes moisture and good drainage, so don’t let them get too dry. You can also add mulch to help maintain the moisture level. It is good to water in the evening during the hot months, and in the late morning or afternoon during cooler months.
Spacing: Once the plants have at least two sets of leaves, space them 8″ to 12″ apart.
Height: up to 2′
Pests: no real pest, occasional caterpillars
Harvest: Plant the seeds 1/2″ deep in well-drained, humus-rich soil in partial sun and water well. The seedlings will emerge in 5-7 days. Swiss Chard matures in 50 to 60 days, but can be harvested for many months. You also can harvest before the plant matures. You can start harvesting the outer leaves when they are only 6″ tall. Harvesting only outer leaves as you need them (instead of harvesting the entire plant at once), allows the plant to continue to produce new leaves from the center. If you do decide to harvest the whole plant, cut it to 3″ above the soil and it will begin bearing leaves again from the center.
Nutrition (Mayo Clinic): Swiss Chard contains 3 times the recommended daily intake of vitamin K and 44 percent of the recommended amount of vitamin A. According to the USDA National Nutrient Database, a 36-gram (g) cup of raw Swiss chard contains 7 calories, 0.65 g of protein, 0.07 g of fat, 1.35 g of carbohydrate, including 0.6 g of fiber and 0.4 g of sugar. One 36-g cup of cooked Swiss chard provides: 18 milligrams (mg) of calcium, 0.65 mg of iron, 29 mg of magnesium, 17 mg of phosphorus, 136 mg of potassium, 10.8 mg of vitamin C, 110 micrograms (mcg) of vitamin A, 0.68 mg of vitamin E, 298 mcg of vitamin K, 5 mcg of folate
Turnips

TURNIPS (and turnip greens)
Turnips are a root vegetable and are commonly grown in temperate climates. There are over 30 different varieties of turnips, purple-tops being the most common. Smaller kinds of turnip are grown for human food whereas larger ones are grown to feed livestock.
Nutritional Information:
In one cup of turnips, there are:
· 36.4 calories
· 1.17 g of protein
· 0.13 g of fat
· 8.36 g of carbohydrate, including 4.66 g of sugar
· 2.34 g of fiber
· 39 milligrams (mg) of calcium
· 0.39 mg of iron
· 14.3 mg of magnesium
· 35.1 mg of phosphorus
· 0.13 micrograms (mcg) of vitamin K
· 87.1 mg of sodium
· 0.351 mg of zinc
· 27.3 mg of vitamin C
· 19.5 mcg of folate
Turnips are high in fiber, which is known to help lower risk of intestinal problems, such as diverticulitis. Turnips are also known to be connected to lowering blood pressure and reducing cancer risk, as well as aiding in weight loss and digestion.
Ways to Prepare:
People can eat turnips raw or cooked. Experts will say that roasting them will bring out their flavors and qualities. Some easy way to incorporate them into meals include:
- Boil and mash them for an alternative to mash potatoes
- Chop or shred raw turnips for salad toppings
- Add them to soup or stew at the side time you would add potatoes
- Cube them and add them to a slow cooked roast
- Add shredded turnips to a coleslaw recipe
Fun Facts:
In Roman times, the turnip was the weapon of choice to hurl at unpopular public figures. // The turnip was introduced into Britain from France by the Romans, and into North American by the early European settlers in the 17th century. // In the 15th century, “turnip eater” was the common term for a country bumpkin.
Recipes:
Check out Dawn’s Brown Butter Mashed Turnip with Roasted Garlic recipe to find a substitute for mashed potatoes
TURNIP GREENS
Turnip greens are part of the cruciferous vegetable family, as are kale and broccoli. They are high in nutrients and low in calories. Turnip greens refer specifically to the stem and leafy green part of the plant. They are among the top foods in terms of the Aggregate Nutrient Density Index.
Ways to Prepare:
Fresh turnip greens should have firm, deep green leaves. They will keep fresh in the refrigerator. People can eat them raw, braised, boiled, sautéed, or added to soups and casseroles. Some easy ways to incorporate them into food are:
- Add a handful of fresh leaves to an omelet or scramble
- Blend a handful of greens into a fresh juice or smoothie
- Sauté greens in a small amount of extra-virgin olive oil and season with freshly ground black pepper and freshly grated Parmesan cheese. Eat as a side dish or top your baked potato
Avoid frying in bacon fat or lard or overcooking as this can trigger a potent and bitter sulfur taste
Recipe:
Turnip greens are a southern staple. To cook Southern-Style Turnip Greens, visit Diana’s recipe
Win Win Choi

WIN WIN CHOI
Win-Win Choi is a type of Chinese cabbage. Instead of cabbage heads, they grow leaf blades that look a lot like mustard greens, but the flavor is nothing like it. They are a smaller version of “Joi Choi” and they can be harvested as a “mini vegetable” or you can wait for it to fully grow.
They are usually grown in China but they increased in popularity in Texas as Asians started to populate the state.
Eating Win Win Choi
There are a few ways one can eat this delicious and crisp vegetable. They’re usually eaten raw, you should also try dipping them in some sauces as the crispy texture makes it a great snack.
They can also be tossed in a salad with many other vegetables to create a rich flavor and a healthy meal.
One of the best ways to prepare it in my opinion is to use the Win-Win Choi in a stir-fry.
Storage:
Don’t wash it before storing it because it will rot faster if done so. Put the vegetable in a plastic bag before placing it in the crisper drawer of the refrigerator. It can last up to five days in the fridge. Wash just before use.
Cooking:
As I’ve said, using them in a stir-fry is one of the best ways as it enhances the flavors. Mixing it with ginger and garlic will give an amazing aroma to the meal.
Slice the vegetable in half and if the base is too tough, cut it off. Rinse them in cold water and dry them off afterward. Heat oil in a skillet over medium fire and throw in grated garlic and ginger with dry chilies. Stir-fry for around 20-30 seconds until you can notice the scent. Put the vegetable face down, close the skillet, and let it cook for one to two minutes. Flip them over and cook for another one to two minutes and turn off the heat. Season with sesame seeds and serve in a serving bowl.
Win Win Choi Production & Farming in Texas
Even though the popularity went up when Asians started making Texas their homes, usually Houston, many farmers from the area aren’t quite sure how to grow these delicious and crisp vegetables. The production of these vegetables isn’t that popular as in other states such as California for example.
Texas A&M AgriLife Research and Extension Serviced united with the local farmers to create a study for these vegetables. The budget of the study is set to be around $50,000.
Local farmers’ biggest distress is the climate difference between China and Texas, but in theory, there shouldn’t be a problem to grow these vegetables in Texas.
Pesticides:
Conventionally-growing these vegetables require far fewer pesticide residues than in some other vegetables such as potatoes or tomatoes. Win-Win Choi is in the cabbage family and the pest problems are also closely related.
Geography:
The vegetable is native to one of the oldest and most renowned agricultural areas in the world. It is believed that people bred the wild brassica type in the area about 3,500 years ago.
To plant them in Texas, grow them in your home for about four weeks before the last frost of the spring. The main reason is, Win-Win Choi is vulnerable to bolting which planting indoors will prevent. They require full sun, or as much soon as possible that you can provide them. You can harvest when the leaves just started developing, or you can wait for them to fully mature.
Packaging:
When harvested, they’re left in the field for about thirty minutes so that it becomes easier to handle. They should be packaged twice, once on the field, and once in the store. They’re packaged in large boxes in which they’re shipped to the stores.

ZUCCHINI SQUASH
Planting Time: Early-ish Spring, after last frost, Early Fall and the air and soil are at least 60° F
Light: full sun and shelter from wind
Soil: well-drained, deep, humus rich
Water: thoroughly water after planting. Water thoroughly, frequently, and consistently with at least 1 inch per week. Do not water shallowly, the soil needs to be moist 4 inches down
Spacing: sow seeds in level ground 1 inch deep and 2-3 inches apart (or sow 3-4 seeds close together in small mounds in rows 3-6 feet apart)
Height: 2-3.5 feet
Harvest: harvest when tender and a bit immature (6-8 inches). Cut (do not break) fruit off the vine with a sharp knife. Leave at least 1 inch of stem on the fruit. Complete the harvest before the first fall frost- highly susceptible to frost and heat damage. Has a relatively short shelf life. Store in the fridge for up to 10 days
Pests: squash bugs, squash vine borers, powdery mildew, blossom-end rot
Nutrition: one cup has: 21 calories, 3.9g of carbs, 1.2g of fiber, 1.5g of protein, 33% of DV of Vitamin C, 10% of DV of Vitamin B6, 5% of DV of Magnesium
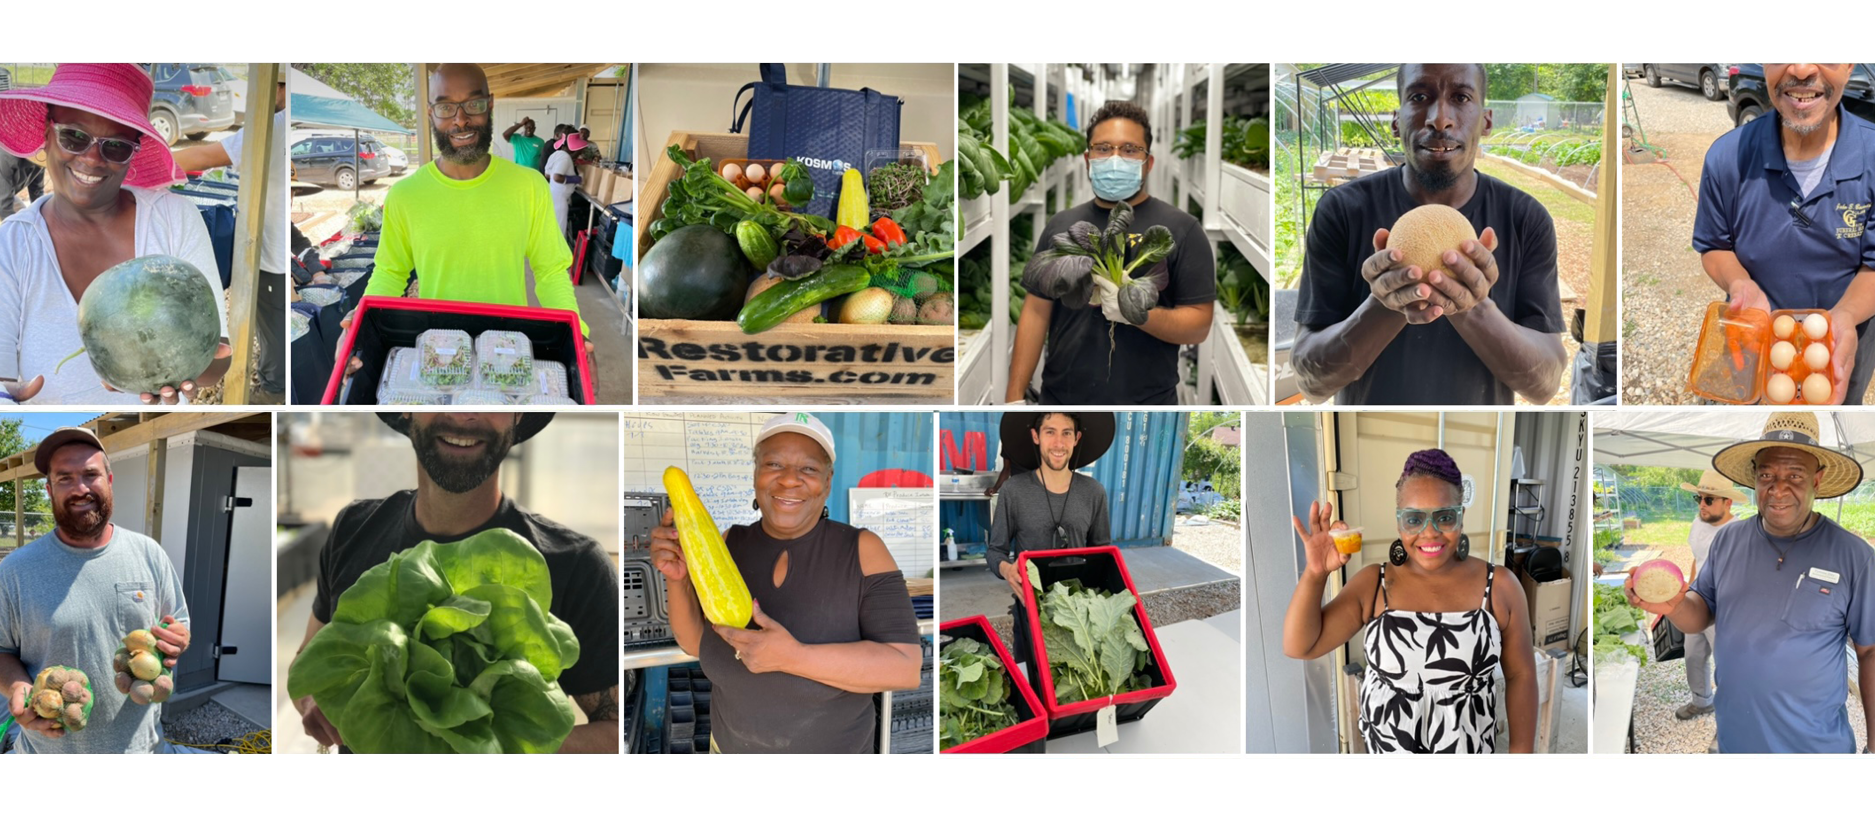
“Growing fresh produce for our community, to empower members of our community, and the change our food system to be more equitable, inclusive, and holistic for all.”
— Restorative Farms